Search for Web 2.0 Tools

Showing posts with label language arts. Show all posts

Monday, December 9, 2013

Create video lessons with questions from any Youtube video for your students.

Here is an excellent new concept and idea from eduCanon.  They have created a website that will allow you to take any Youtube or Vimeo video and create a lesson based on the video.  Again, an excellent idea.

Assign the activity to your students.  They will then log in and go to the lesson.  Next they will view the video that will have questions as you go along.  Your students will answer those questions which are then graded for the end of the film so that you can see how well they did.

Students will be able to view remedial material from anyplace in the world and their learning will be reinforced by some extra content.

Here is a tutorial on some of the features in the eduCanon system.

1.  Make sure you sign up at www.educanon.com.  It is free, but some of the premium features are going to cost some money.  Log in to the system.


2.  Click the "Build" tab at the top of the screen.


 3.  Next give your lesson a title and objective.  Also select the grade level, subject, and subtopic.  Also paste the URL to the video you want to create a lesson with.


4.  Now start watching your video.  When you come to a place where you would like to insert a questions, click the "Build Question" button.


5.   Just type the questions into the text box.  You do have formatting options.  Toward the bottom you can type in the answers.  Make sure that you select the correct answer.  If you need more answer choices click the "Add Answer" button.  When you are done with the question click the "Save Question at ..." button.


6.  You should now be able to view what you question looks like.  You can update it by clicking the edit button.


7.  As you are adding questions you will notice question marks being added to the bottom of you video's screen.  These are where you questions will be inserted.  Once you are done with your video lesson, click the "Finish Build."


 8.  A popup window will appear asking you to assign the lesson.  The "Assign Lesson" button will allow you to enter a calendar so that you can assign an appropriate date to your lesson.


9.  Just click the date you want your students to be able to access your lesson.


10. You will see your video lessons appear on the right hand side of you screen.  Just drag and drop them onto the lessons canvas.


11.  When your students view the lesson they will be prompted to answer questions at the specified video time.  They will then submit their answers.


12.  If you click on the "Lessons" link you can see all of the lessons you created.  There are three buttons on the video's thumbnail.   The first one that looks like an eye allows you to preview your lesson like a student would see it.


13.  The second button allows you to share the lesson.  Below is an example of a Bill Nye the Science Guy video lesson.  I only have the first three questions done so that you can see what it is like.  If you wait until the 27th second you should be able to see how the questions with the video actually work.


Comment below if you are using eduCanon in your classroom and let us know how it is going.


Wednesday, November 20, 2013

Use Rewordify with your students to improve literacy

I came across a neat site last night called Rewordify.  This is a pretty neat idea and I can't believe it hasn't been created before now.  Have you or your students ever found an article that can be hard to read because much of the vocabulary consists of words you might not know or understand?  Rewordify allows you to copy and paste text or even link to a website and it will rewrite and simplify the text.  It will highlight everything it changes and allow you to see the definition to the words.  As a teacher you can then even take it another step further because the sight will allow you to create a word and definition/synonym list that can then be printed and used as a study guide.  This website is really worth looking into.  There is a video from their site at the bottom of my tutorial that give you more of a visual.

Tutorial


2.  Copy and past text or a website URL into the text box.  Then click the "Rewordify text" button.


3.  You will now notice that some of the text is highlighted.  Those are the words that have been changed and simplified.


4.  If you click on the highlighted area it will show you the original word.


5.  As part of Rewordify you also get information about the text you are reading.  You can see that it will tell you how many letter, words and reword (word that have been changed).  One of the neat aspects of this chart is that it also lets you know the reading level of the text.


6.  You can also click the "Save & share" button which will generate a link to that exact rewordified text.


7.  Rewordify also can take those words and create definition and word lists, quizzes, flashcards, worksheets, etc... with just a single mouse click.


8.  Below is an example of a "List with Definitions."


9.  At the top you will see a "Settings" button that will allow you to decide how you want your highlights to be.  There are quite a few options worth exploring.  The default for me is enough, but you might want to change settings that might fit your or your student's needs.

Here is a video tutorial on using "Rewordify."


Leave a comment to let me know how you are using Rewordify.com in your classroom.

Saturday, June 29, 2013

Students be creative writings stories using StoryBird.

StoryBird came up with a great way for students to digitally write and express themselves.  They already have hundreds of works of art that are themed so students have a lot to choose from.  Students can write their stories in many different categories and then digitally publish them so that others can view and read their thoughts and ideas.  An example of a StoryBird book is provided below.  Also there is a tutorial on how to use StoryBird.


StoryBird Tutorial

1.  Go to www.storybird.com and click the "Create" button.


2.   Your students will now choose a theme to work with.  There are many to choose from.  All you need to do is click on one of the pictures on the right hand side.  If you want to browse for more, just click the refresh button in your browser and a whole new set of images will appear.


3.  Decide what you are going to write; either a story or a poem.  Click on your preference.


4.  You will now be taken to a screen that has pictures relating to the theme that you chose in step 2.  Just drag the images you want onto your story book in the middle of the screen.


5.  As you are dragging the image onto the page you will see it highlight in different locations.  Where ever you place your image will decide where you get to write.  As you can see from the image below, if I drop the image there, it will be on the left hand side and I will be able to write on the right hand side.  Try dragging the image around until you find the best placement for your story.


6.  Now just write the first part of your story into the text box.


7.  Over to the right hand side you will see a "+" sign.  Click it to add another page to your story.


7.  At the bottom of the screen you will see your story unfold.  


8.  When you are ready to design a cover just click on the "Cover" page from your page layout.


9.  Choose the cover style that you would like to have.


10.  Choose the colored background for your text.


11.  Type your title and author into the appropriate boxes.


12.    When you are ready to share and publish your book, just click the "Menu" button from the bottom left of your screen and then choose the "Publish" option.


13.  Here you can change your title and add a summary for your book.


14.  Choose the age group your story is most likely to belong to.  Decide whether you want it public for all to see or just keep it private.  When you are done just click the "Publish" button.
//Amazon

Thursday, May 17, 2012

Create research papers using Google Doc's research pane.

I have been recently accused by coworkers as being on Google's payroll because of how much I bring it up when helping teachers with solutions to their educational technology issues.  I am not, but I think that Google should pay me!!!  Just kidding.  (Sort of.)  Let me shout out though the "I Love Google APPS!"  Google has done a great job keeping educators and their students in mind when developing ideas and products.  Today they are beginning to release the Google Doc's "Research" pane.

What can I do with this web 2.0 tool?
  • Site sources directly from the research pane.
  • Drag and drop pictures while using the pane.
  • Browse websites from within the research pane.
This tool is awesome!!

Tutorial

 1.  Log into your Google docs.  If it hasn't changed yet, it will soon be called "Drive."


2.  In the "Tools" menu click the "Research" option.  This will then open the "Research" pane on the right hand side of your document.


3.  Type in your research key words.  This will then automatically start searching.


4.  In my example using dogs, you will notice that images will be displayed from Google images.  The search sometimes will give you some neat things such as "Also know as", "Other names," and "Classifications."


5.  If you left click on an image it will grow in size to give you a larger image. 


6.  If you left click and hold on the image you can then just drag the image over to your document.


7.  The really cool thing with this is that you will see a little number by your picture which then give it a cited source.  Now you wont be able to see the citation until you get ready to print.


8.  Here is what it would look like when getting ready to print your pages.


9.  Now if you hover your mouse over some of the research sources you will get three buttons that will appear.  The "Cite" button will create another citation for the website that you use.


10.  The "Insert link" button will insert a reader friendly link into your document.


11.  The "Preview" button will give you a snapshot of what the webpage you might visit would look like.


The is really all there is to using the Google Research Pane.  Please share this with your students or if you are a student, let your teachers know.  This will truly help those using Google Docs/Drive complete their research in much less time and frustration.

Monday, February 27, 2012

Create Educational Interactive Timelines with TimeRime

How cool would it be for History, Language Arts, Art and Science teachers to have their students create a timeline that can be both informative and interactive.  TimeRime allows for this to occur in the 21st century skills classroom.

Here is an example:


What are the advantages of using TimeRime?
  • You can embed your timeline in a blog or webpage.
  • You can add text, video, and images to the time line.
  • It can have tons of events that span a large time frame.

Tutorial


1.  Go to www.timerime.com
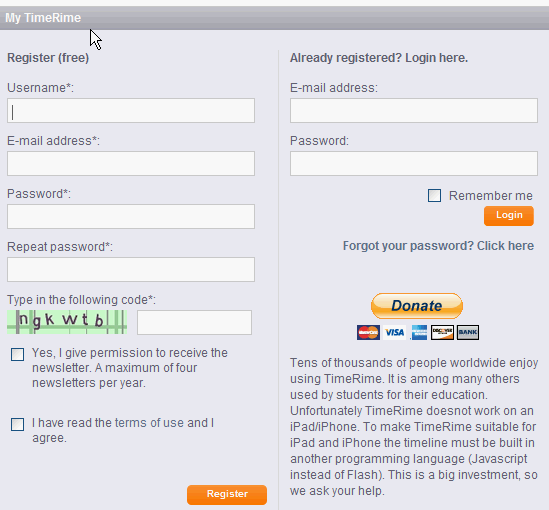
2. Click the "Login or register" button at the top.


3.  Fill in the registration for or enter your registered information.  If you are just registering, note that you will need to confirm your email address.


4.  Once you are logged in click the "Make a new timeline" button.


5. Fill in the form with your information about your future timeline.  Make sure you decide whether you want the timeline to be public or private. When you are done, click the "Save" button. 


6.  Now add the information for your first event.  To make your timeline more interactive add an image to it by clicking the "Add Image" button.


7. Here is where you can upload your photos that are relevant to the subject.  Once your picture or pictures are uploaded click the "X" button to close the screen.


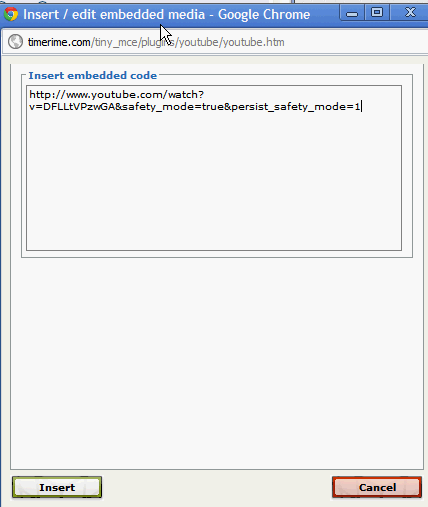
8.  Add even more interactivity by adding a Youtube video to your timeline.  Once you click the "Youtube" button, you will see a new popup box.  Here is where you will paste your Youtube embed code.  Click the "Insert" button when you are done.

9.  Once you are done adding all of your content then click the "Save and new" button which will open up a new dialogue box so that you can add your next event.  After you have entered all of your events click the "Save" button on the last even form.


10.  Your timeline will now show up and look something like the example I embedded into this blog post.  To embed your blog, just click the "< >" symbol above your timeline.  This is the universal symbol for HTML code.

11. Choose some of the "Sizes" options and then click the "Generate code."  Click on the code and it will highlight.  Right click and copy and then paste it into your blog or website.


Well that is all there is to using Timerime and all of that is for free, so enjoy your experience.