I am a big supporter of teachers who give choices to students on how they will present material in class. I find that too many in the education community are still telling their kids that they have to draw, PowerPoint, or build a model that will demonstrate what they learned. Some people, like myself, are still drawing stick figures and so when a teacher assigns them an assignment where they have to draw, they might feel a little intimidated or a lack of desire because they know they won't do well. I say that with the understanding that it really is OK for a student who doesn't draw well to still be made to draw because that is how they get better and grow. But, if a teacher is not assessing a student's ability to draw, why not give the students many different options to present their material to the class and the teacher. There are so many presentation alternatives than just using specific methods like PowerPoint, even though PowerPoint is a great solution. I have compiled 17 alternatives to PowerPoint on the Web 2.0 tab at the top of this blog.
The presentation method I would like to highlight today is Glogster.
What is Glogster?


The presentation method I would like to highlight today is Glogster.
What is Glogster?
- Glogster is web site that allows you to create an online poster. On the poster you can manipulate text and titles, add cool backgrounds, and add videos. After you create your poster you can then share it or embed it.
What are some disadvantages to using Glogster?
- You do need to register before using it. There is a bit of a learning curve, that can be overcome with a little practice. I had a few problems uploading large pictures from my computer, but didn't have any problems using pictures from the web.
Here is an example of a students Glogster Poster. If you are interested in learning a little bit on how to use the site there is a tutorial below.
Tutorial
1. Go to the website www.glogster.com
2. Register to use the site. Note that you can use your Facebook account.
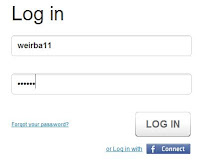
3. Once you are registered, log in to the site.

4. When you first login you will get a title box. Enter the information. You can lie if you want. I did. I don't really believe in giving out personal information online unless it is to somebody I really trust.

5. Click the "Post New Glog." button.

6. Decide whether or not you want your glog to be Portrait or Landscape style.

7. Click the "Add Content" button.
8. Play with the "Text" tab to develop titles or text boxes. There are many different styles and templates.

9. The "Graphics" tab has many different types of clip art. Once you decide which one you want click on the "Use it" button.

10. On the "Image" tab you can choose from many types of images and frames for those images.

11. On the "Wall" tab allows you to upload or use images for your poster's background.

12. Add audio to your Glog by using the "Audio" tab.

13. Finally the "Video" tab allows you to embed many different video sharing sites' videos.

14. When you click on any of the objects, a square will appear around the object. Going from left to right on the top of the following picture you have: "Text" which allows you to change your text box style. The next one brings your image to the front of another image and the next one over does the opposite. The third button will create a "clone" of your object. The last button deletes the object. Going towards the bottom now you have the color changer, the next one down will allow you to link to external data. The ABC button lets you change the font stile and size. The last button gives you options for shadowing your object. Also you have the "handles" around the square and those allow you to change the angle of your object and resize your object.

15. Once you are done with your poster click the "Preview" button to see what your Glog looks like and then if you are satisfied click the "Save and Share" button.

16. You will now be asked to give it a title and internet tag it. Decide whether you want it to be public or private. Click the "Save and Share" button once you are done.

17. This page will let you share it to Facebook or Twitter as well as give you a link that you can email to people.

Let your students use Glogster the next time they have to give a report. The will love it.
One of my students tried this but she didn't get it shared properly. We'll try it again sometime this year. :)
ReplyDeleteIf you do, let me know how it goes with the student laptops. I would love for it to work properly on Linux but haven't tested it yet.
DeleteI like ur post. Will forward :)
ReplyDeleteThanks Shamsensei. Thanks for stopping by.
DeleteThiis is awesome
ReplyDelete